Advanced Technique
Creating a custom header is an advanced technique and requires familiarity with html.
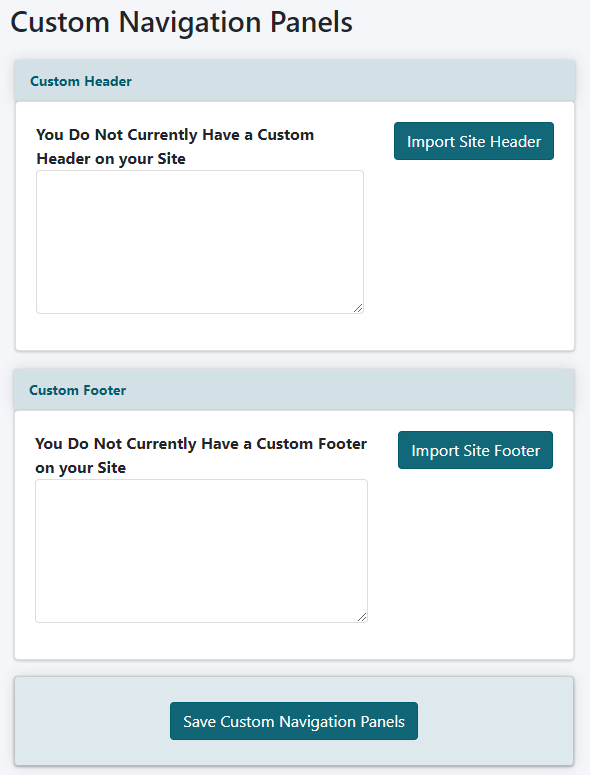
It is possible to replace the normal top logo and navigational area of your site with something that is custom designed.
Please note that a custom header does fall outside of MemberGate's support offering, so we are unable to support custom headers. Also, when using a custom header the automated ability to add and remove items from the top nav bar through the control panel is not available. Any changes to the top nav bar would require editing the custom header HTML coding.
The Custom Nav Panels Option is ONLY available when using the Legacy Theme. If any other theme is selected, this option will not be available in the control panel.
Custom Nav Panels design settings can be edited under Appearance Custom Nav Panels
Custom Header

Step 1: Import Site Header
Click the button. This will pull the existing header into the box. The existing header can be used as a template as it contains the existing div and css code structure to use for the custom header.
Step 2: Update the Header Code
Update the code with the custom html coding.
Step 3: Save
Click the button to update the header.
Step 4: Rewrite Site Descriptions
Click the in the top of the control panel to open the right nav panel. Click under Master Settings Edit Site Descriptions
Click the button to update the header.
Custom Footer
Step 1: Import Site Footer
Click the button. This will pull the existing footer into the box. The existing footer can be used as a template as it contains the existing div and css code structure to use for the custom footer.
Step 2: Update the Footer Code
Update the code with the custom html coding.
Step 3: Save
Click the button to update the footer.
Step 4: Rewrite Site Descriptions
Click the in the top of the control panel to open the right nav panel. Click under Master Settings Edit Site Descriptions
Click the button to update the header.
