Tutorial

Steps to Take
First: Connect your AWeber API key to MemberGate, then you can add your lists to your member plans, shopping cart products or affiliate program.
Instructions for each of the different AWeber integration steps can be found in each tab below.
Click on each tab for more information.
Connect to the AWeber API
Connecting to the AWeber API is only necessary one time. After the connection is successful, your AWeber lists will be available to select in member plans, shopping cart products or in the affiliate setup.
AWeber settings can be setup and managed under API Service Settings Autoresponders AWeber
Click on each section to expand for more information.
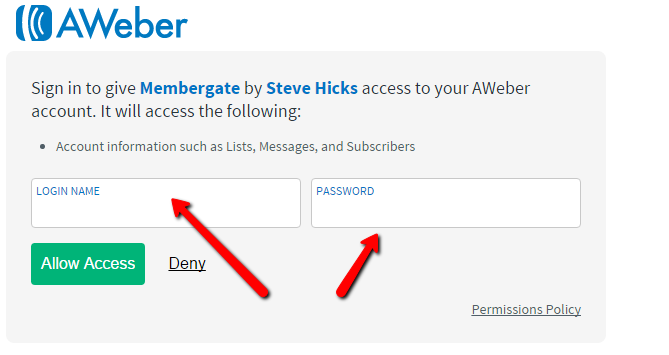
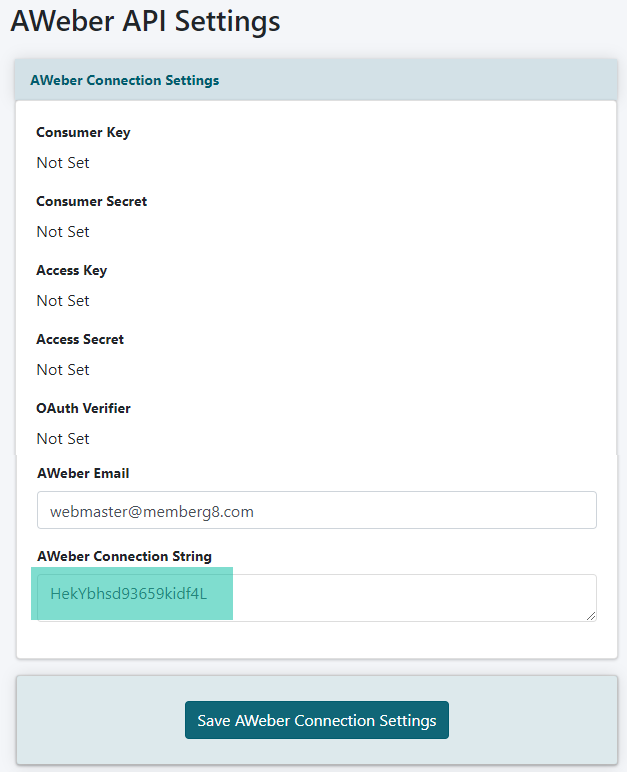
Click on the button at the very bottom. That will take you to a page at AWeber. Enter the login information for your AWeber account. On successful login, a connection string will be provided. Enter that string into the 'AWeber' Connection String box'and then press the button. The AWeber account will now be connected to your MemberGate site.
Connect AWeber Lists to Member Plans
Automatically add new members to your AWeber list upon subscribing to your site. The name and email address for each member will be automatically sent to AWeber after they have subscribed.
A unique AWeber list can be selected for every member plan.
A unique AWeber list can be selected for every member plan.
Edit Member Plans
The Member Plans can be managed under Members Edit Member Plans
Choose an existing plan from the drop down menu or choose to add a new plan.
List Server Sign Up Code
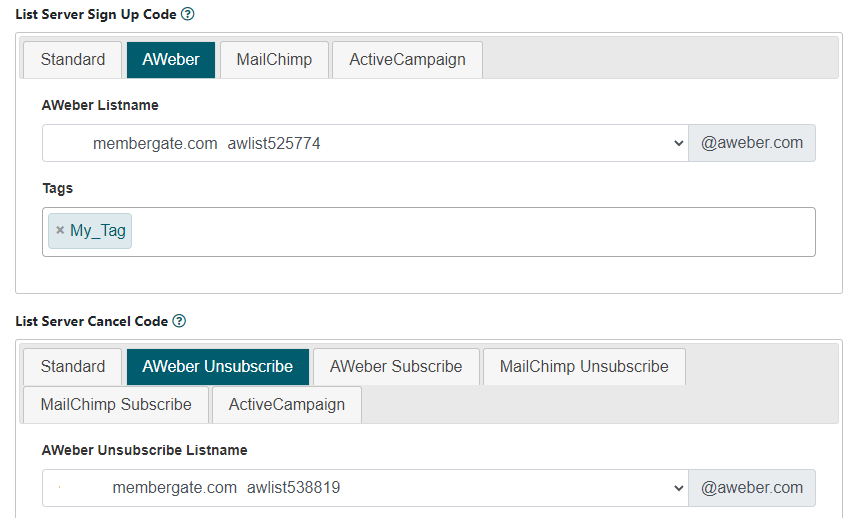
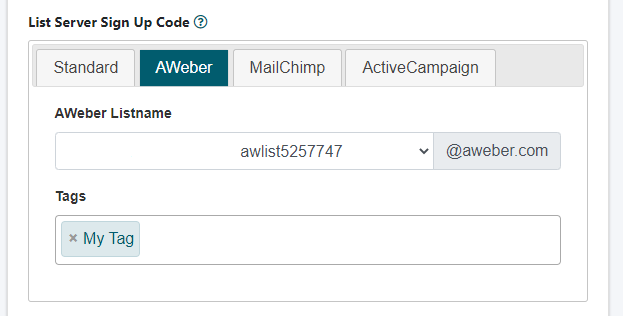
Open the 'List Server Codes' section if necessary and select the 'AWeber' tab.
When a new member subscribes, their name and email address can automatically be sent to your email marketing list.
Select the 'AWeber listname' from the drop down menu, and 'set any available tags'.
List Server Cancel Code
When a member cancels, they can automatically be removed from the marketing list or moved to a different list. Choose 'Unsubscribe' to remove them from their existing list. Choose 'subscribe' to remove them from their existing list and add them to a new list. Choose the new list from the drop down menu.
Run List Server Cancel Code when?
Choose at which point you would like the member to change according to the List Server Cancel Code. Should the cancel code run when the member goes 'inactive', 'cancels' or is 'deleted' from the system.
Connect AWeber Lists to Shopping Cart Products
Automatically add customers to your AWeber list upon purchasing a product from the shopping cart. The name and email address for purchasers will be automatically sent to AWeber after they have purchased the specific product.
A unique AWeber list can be selected for every product.
Add/Edit Products
AWeber files can be connected to each product under Commerce Shopping Cart Add/Edit Products
List Server Sign Up Code
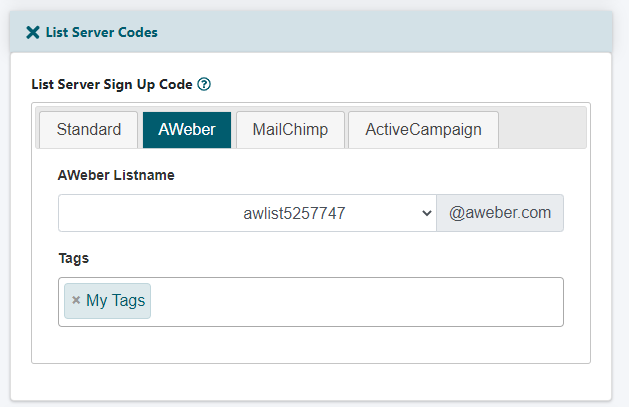
Open the List Server Codes section if necessary and select the AWeber tab.
AWeber listname
Select the AWeber listname from the drop down menu, and set any available tags.
Connect AWeber Lists to Your Affiliate Program
Upon signing up as an affiliate member, the affiliate's name and email address can automatically be added to an AWeber list.
A unique AWeber list can be Set for Affiliate Members
Affiliate Program Settings
The Affiliate Program settings can be managed under Commerce Affiiate Program Settings
List Server Sign Up Code
Select the AWeber tab.
AWeber listname
Select the AWeber listname from the drop down menu, and set any available tags.
