A custom link menu can be added to your theme or a desired area of your site using the Menu Builder option.
The link menu can be created beyond using just standard departments. Custom links and sub-menus can also be added. The arrangement of the links can be manually set to allow as much customization as needed.
There are two steps to take:
1) Create the custom menu
2) Add the menu to your site

Follow the instructions found in the tabs to create a custom menu.

Menu Builder
Custom menus can be created and managed under Appearance Menu Builder
Create New Menu
Select 'Create New Menu' from the drop down menu and click button to begin a new menu.
Menu Name
Enter a topical word for the items in the menu. The menu name will appear as the header of the custom menu.
Add a Departments
A listing of the departments (and courses) on your site will appear under the 'Available Departments' section. To add a Department click the name of the department and drag it into the Menu section. Repeat for all departments (or courses) that should be added to the menu.
Remove a Department
If a department was added to the Menu section by mistake, click the department box and drag it back to the 'Available Departments' section.
Arrange the Department Order
The department boxes can be manually updated to appear in the desired order. Simply click the department box and drag it where you would like it to show on the list.
Save
Click the button.
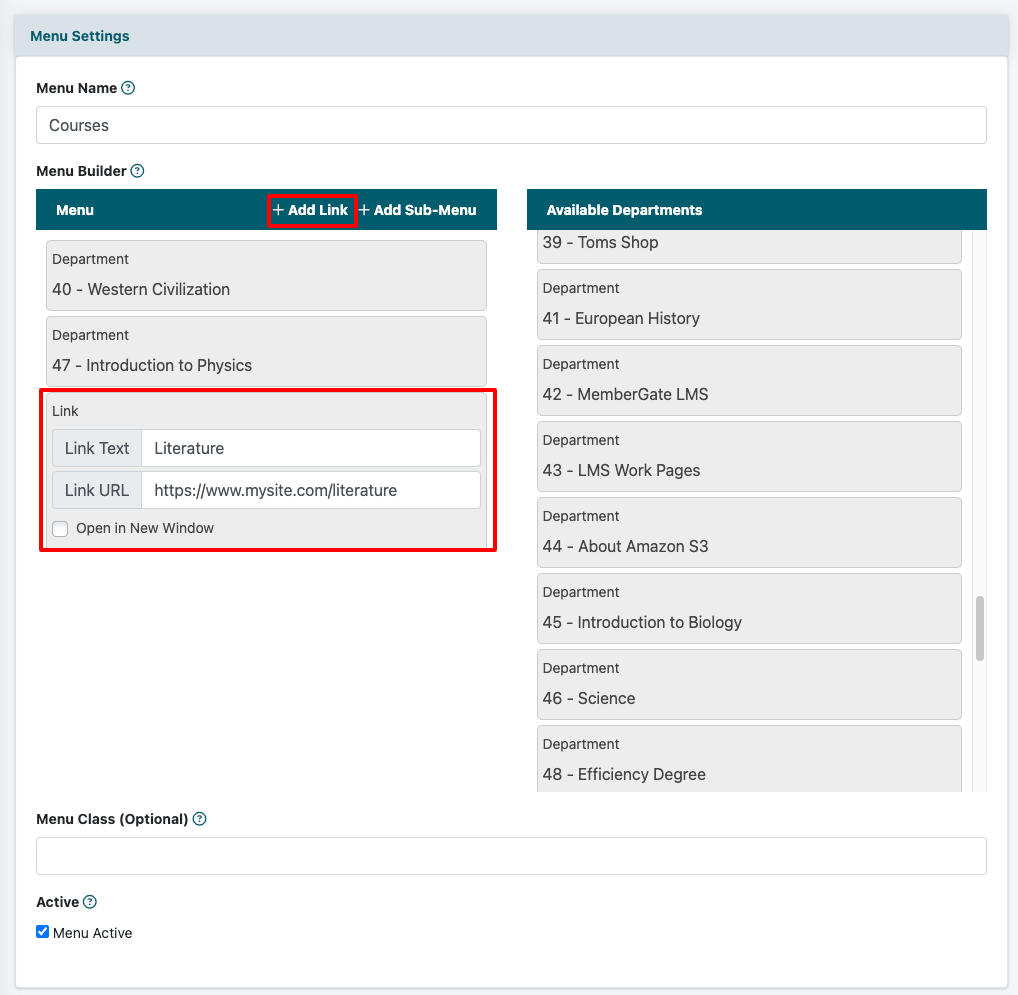
Add a Custom Link to the Menu
A link can be added to the custom menu without it being available as a department or course.
Select + Add Link
Located on the right side of the header of the Menu section, click on + Add Link to add a custom link to your menu.
Link Text
Enter a term for the link text. This is the word that will appear on the menu listing.
Link URL
Enter the full web address for the link. This is the page the user will redirect to upon clicking the link text.
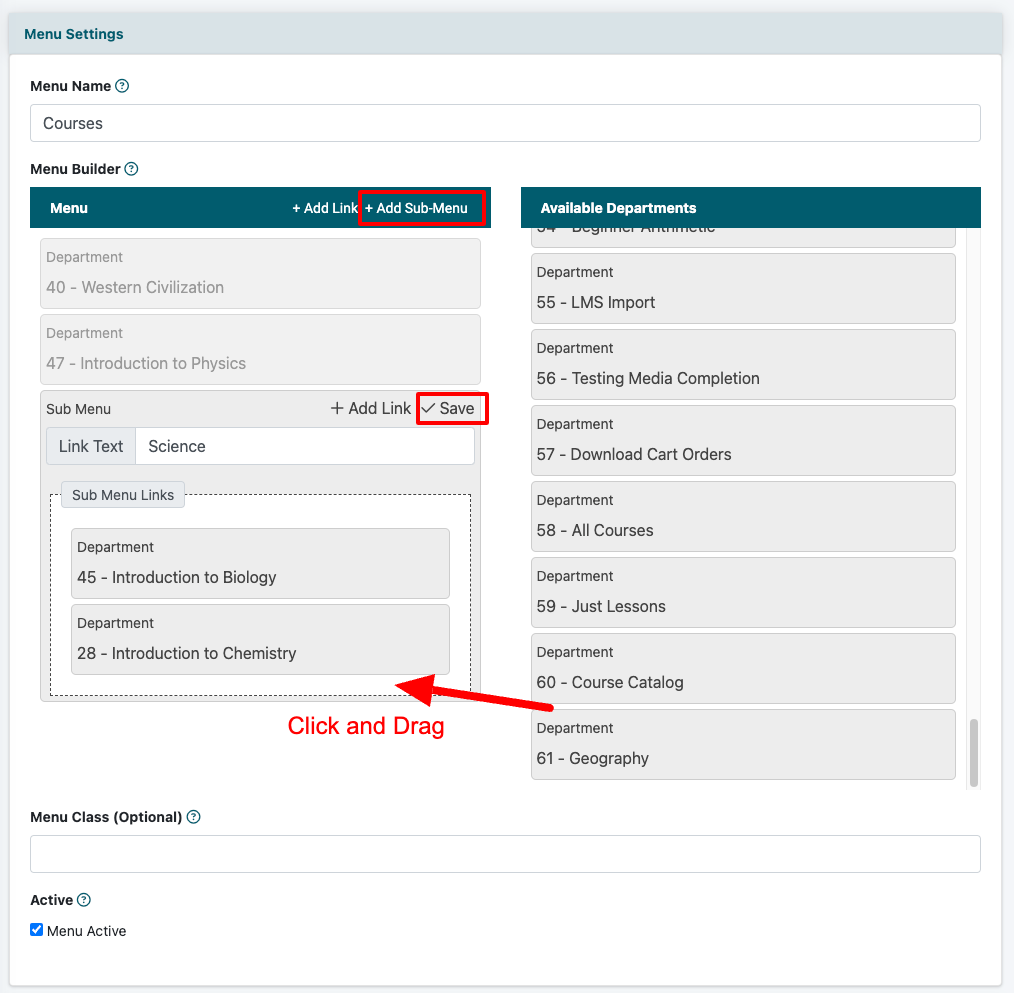
Add a Sub-Menu to the Menu
A sub-menu can be added to the custom menu. When the user hovers over the main sub-menu text, the sub-menu will open.
Select + Add Sub-Menu
Located on the right side of the header of the Menu section, click on + Add Sub-Menu to open the sub-menu setup box.
Link Text
Enter a term for the link text. This is the word that will appear on the menu listing. When a user hovers over this word the sub-menu will open.
Sub-Menu Links
Click a department or Course from the 'Available Departments' section. Drag the department or course into the Sub-Menu links box. Repeat for all departments or courses that will appear in the sub-menu.
Custom Link
Click the + Add Link option to add a custom link to the sub-menu. Enter the link text and full web address url for the custom link.
Save
Click the Save option in the sub-menu box to save the sub-menu settings.
Add the Menu to your Site
The menu can be added to the footer area of a theme or in a custom area of your site.
Add the Menu to your Theme
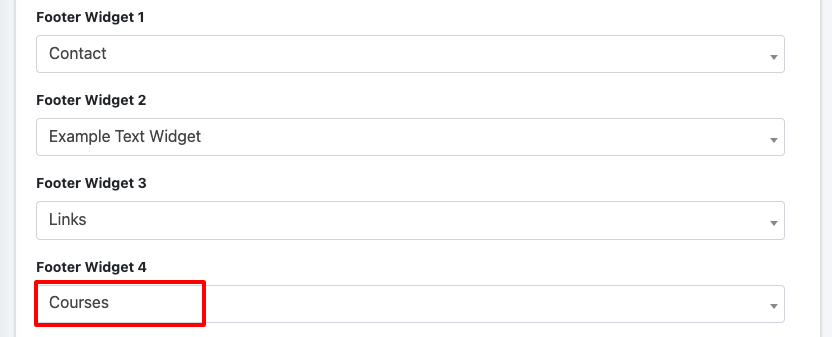
Add to the Footer Area
The menu can be added to the footer area of the site under Appearance Theme Settings
Choose the Theme
Click on the icon of the desired theme to edit it.
Footer Widgets
Select the name of the 'Custom Menu' from the drop down menu of the desired footer widget.
Add Anywhere
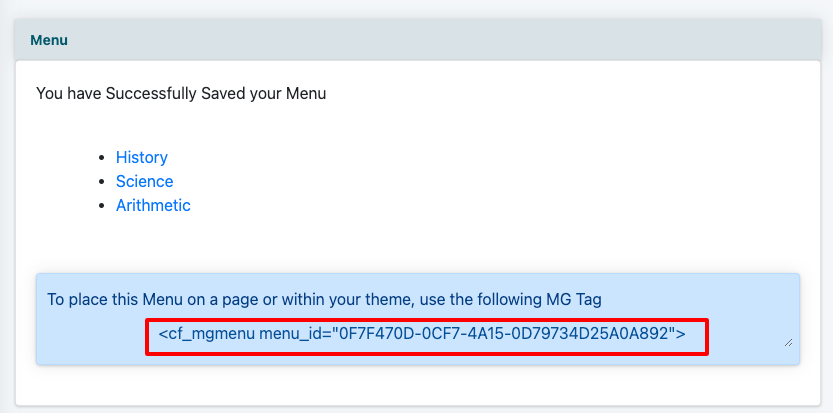
Custom Menu CF Tag
After the custom menu is saved or edited, the system will provide a cf tag.
Copy and Paste the CF tag
Copy the cf tag and paste it where you would like the menu to show. It can be added to a page, or a nav bar by adding it to a Category > Script for this Category box